I thought I'd post a few of the canning questions I've gotten from folks over the last several weeks, posed here or on Facebook or by email or in person. If you have more, leave them in the comments, and I'll post again with answers if I have them, and eventually I'll figure out how to put an FAQ page on this blog thing. So here goes . . .
Where can you find citric acid for canning tomatoes and tomato sauce?
Some health food stores carry it, as do some Indian groceries (where it may be labeled "lemon salt"). It's available online from Amazon, Kalustyans, and Leeners, among many other vendors. If all else fails, you can use lemon juice or Fruit Fresh, which is citric acid stepped on with ascorbic acid and anti-caking agents (see the quantities for lemon juice and Fruit Fresh in the recipes in the book).
Do you have to dry off the flat jar lids after they've been in the hot water and before you put them on the jars?
No. Just slap ’em on.
Can you forgo peeling the tomatoes for sauce and just blend them up, skins and seeds and all?
Sure. Just wash the tomatoes really well first (there are more bacteria on the surface of the tomatoes, obviously, though those will be killed during the long processing time in the canning pot).
Can you can pesto in a boiling water bath?
No. Pesto is not an acid food (it has a high pH), and so it's not safe to can it in a boiling water bath. Freeze it instead!
What are your favorite things to preserve?
Sour cherries, all-purpose tomato sauce, salsa verde, and grapefruit marmalade are some of my favorites. They're extra-fun to make and delicious and useful.
Are your recipes approved by the USDA?
No. As far as I know, the only recipes officially approved by the USDA are the ones published in its handbook and online at the National Center for Home Food Preservation. The USDA is not in the business of evaluating or testing recipes to be published by private companies; the agency has developed its own recipes, and those are the ones they officially stand behind. That said, all of the canning methods described in my book conform exactly to current USDA standards for processing: I don't advocate the so-called open kettle or inversion method, I ask you to sterilize jars in boiling water rather than in a dishwasher or oven, processing times are totally in line with the USDA's recommendations, and so on. Fruit preserves in my book are significantly lower in sugar than those made by standard recipes, but when fruit (which is high acid) is canned using reliable methods sugar is not necessary for preservation purposes. The canned pickles in my book were tested for pH levels at several stages in the process—before processing and several days or weeks later—and packing and processing times conform to those recommended by the feds (in addition, temperatures were checked during processing using the method required of commercial canners by the FDA). If you still have concerns about a recipe—mine or any other—you can always send it to your local extension agent to ask if it looks okay to him or her. And, as always, use your judgment when opening and using a canned food, whether it has sealed properly or not. If anything doesn't seem right to you, toss it!
Wednesday, July 28, 2010
Friday, July 23, 2010
Kid Lunches
 We don't usually eat this much pasta! I guess I just had a craving for it, or rather for the ease of it, as I was a bit under the weather last week. As usual, you can see details in the Flickr set here. If T. were rounding up the highlights, she'd mention the peas and carrots (which she requested), the Asian pear, the edamame, the potstickers of course, the tomato (as I was filling her box, she said, "That tomato smells so good!"), and the chocolate chip cookies. Lowlights would include the lentils, lychees (which she loved until this year), fresh cheese with "not-real" (translation: cooked) cherries, and that horrid raw carrot.
Saturday, July 17, 2010
Pictures of the Gosford Wine Event
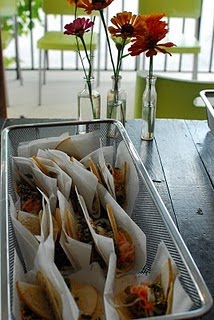
My friend Clare Adams took these lovely pictures of some of the food at the tasting and book signing the other night, and I thought I'd share them here with her permission. Rinne brought the summery flowers and let T. arrange them in those cute apothecary bottles.
 I had tons of help filling tacos, pouring little cups of hot-pink cold beet soup, slicing bread and spreading it with fresh cheese and butter, scooping out single-cherry tastes of clafouti, and even dumping good crunchy tortilla chips into my big old butter-washing bowl for dipping into last year's super-spicy salsa verde. I didn't do a thing all evening, now that I think about it, except enjoy myself.
 Rinne's sister, Lucy, who has the soul of a high-end caterer and the work ethic of an early American settler, arranged everything invitingly on two big wooden farm tables, with pretty paper napkins (Ikea, I think), rough linens, ironstone plates and platters, and in some cases simply dry waxed paper sheets (my beloved Kabnet brand, which I'd gotten to hold the tacos). And Lucy kept those tables looking spiffy and abundant all night long. D.'s coworker Anne and her daughter showed up during preparations and instantly set to work making tacos, refilling platters, and basically doing everything I'd expected to be doing.

 T. helped me trim the little threads from the cards—she cut the corners off most of them too. (Here's a bad preparty shot I took of that cake, showing my genius cutting job in all its forty-eight-tiny-slice glory:)
 It was a great time, and I felt very lucky to have been able to meet so many people who are enthusiastic about cooking and eating—and canning.
 I had tons of help filling tacos, pouring little cups of hot-pink cold beet soup, slicing bread and spreading it with fresh cheese and butter, scooping out single-cherry tastes of clafouti, and even dumping good crunchy tortilla chips into my big old butter-washing bowl for dipping into last year's super-spicy salsa verde. I didn't do a thing all evening, now that I think about it, except enjoy myself.
 Rinne's sister, Lucy, who has the soul of a high-end caterer and the work ethic of an early American settler, arranged everything invitingly on two big wooden farm tables, with pretty paper napkins (Ikea, I think), rough linens, ironstone plates and platters, and in some cases simply dry waxed paper sheets (my beloved Kabnet brand, which I'd gotten to hold the tacos). And Lucy kept those tables looking spiffy and abundant all night long. D.'s coworker Anne and her daughter showed up during preparations and instantly set to work making tacos, refilling platters, and basically doing everything I'd expected to be doing.
 T. helped me trim the little threads from the cards—she cut the corners off most of them too. (Here's a bad preparty shot I took of that cake, showing my genius cutting job in all its forty-eight-tiny-slice glory:)
 It was a great time, and I felt very lucky to have been able to meet so many people who are enthusiastic about cooking and eating—and canning.
Thursday, July 15, 2010
Tonight at Gosford Wine
Just a quick reminder that tonight at 6:30 is the wine and preserve tasting at Gosford Wine on Baxter Street here in Athens. (With any luck there will be books to be had as well.) Hope to see you there!
Tuesday, July 13, 2010
Cultured Butter
 A while back, I became smitten with Vermont Butter & Cheese Company's cultured butter. It tasted like no other butter I'd ever had: funky, earthy, but delicate and just a little tangy. It's hard to describe, but the butter was different enough from regular butter that T., who is four, claimed not to like it at first (it's grown on her since then). I tried culturing some cream with buttermilk, but the result was bland—not right. I'd read about piima butter, made from a Scandinavian-style culture derived from the butterwort plant that is apparently similar to the culture used in buttermilk, acidophilus. Descriptions of it sounded like what I was going for, so eventually I broke down and ordered a little jar of piima culture from an outfit called Moonwise Herbs, which unfortunately ships the ready-to-use (not dried) culture only in cooler months; however, there are lots of other places online that sell piima.
The flavor of butter made with cream cultured with piima is amazing. And it's so, so easy to make this at home—that is, once you have a bit of culture. The culture will keep for a couple weeks in the fridge, or you can freeze it for months before refreshing it by mixing it with new cream and letting it ferment for a day. Just remember to save some of the cream for next time before whipping the rest into butter. Instructions that came with mine say it's best to use pasteurized cream so that the character of the culture remains consistent over time. For those of us in Georgia this shouldn't be a problem.
Cultured Butter
Makes about 7 ounces, depending on the fat content of the cream
2 to 3 tablespoons piima culture
1 pint pasteurized heavy cream
In a nonreactive bowl, stir together the culture and cream. Cover with plastic wrap and set aside to culture at room temperature (or warmer) for 12 to 24 hours. The mixture should thicken, sometimes a little and sometimes a lot, depending on the temperature and probably other factors that are mysterious to me. This time it thickened a lot:
 Scoop a few tablespoons of the cultured cream into a lidded jar and save it for the next batch. I just put this straight into the freezer, where I'm told it'll keep for months:
 Whip the cream with a mixer or an immersion blender. I think you could do this in a food processor, but I don't have a regular-size one and the cleanup would surely be more intensive than with a mixer or immersion blender. Keep whipping past the thick-whipped-cream stage to the point where the solids separate from the liquid, slowing the mixer speed down as this happens:
 Holding back the solids (the butter) with your hand or a sieve, pour off as much of the liquid as you can. This is cultured buttermilk. I usually get about a cup from a pint of cream. Here I've transferred the butter back to the first bowl, but you could do this all in the same bowl start to finish:
 Put a few handfuls of ice and some cold water in the bowl with the butter:
 Use a spatula or wooden spoon to stir and knead the butter with the ice water. The water will become milky as the remaining buttermilk is kneaded out of the butter. Holding the butter (and any ice cubes) back, drain off the cloudy water. Add more ice and clean water and keep kneading to wash out the buttermilk, draining and replacing the water and ice until you can knead the butter and the water stays relatively clear:
 Drain again and pick out the ice cubes, if there are any that haven't melted. Knead the butter some more, pouring off the water that comes out. Keep kneading and draining to remove as much water as possible. I imagine there are more effective ways of getting all the water out, and they probably involve butter muslin, but I just knead, drain, and then sort of pat the butter with a paper towel until it looks pretty dry:
 Stir in salt to taste, if you'd like, then pack the soft butter into a container and cover with waxed paper (or wrap it into a log in plastic):
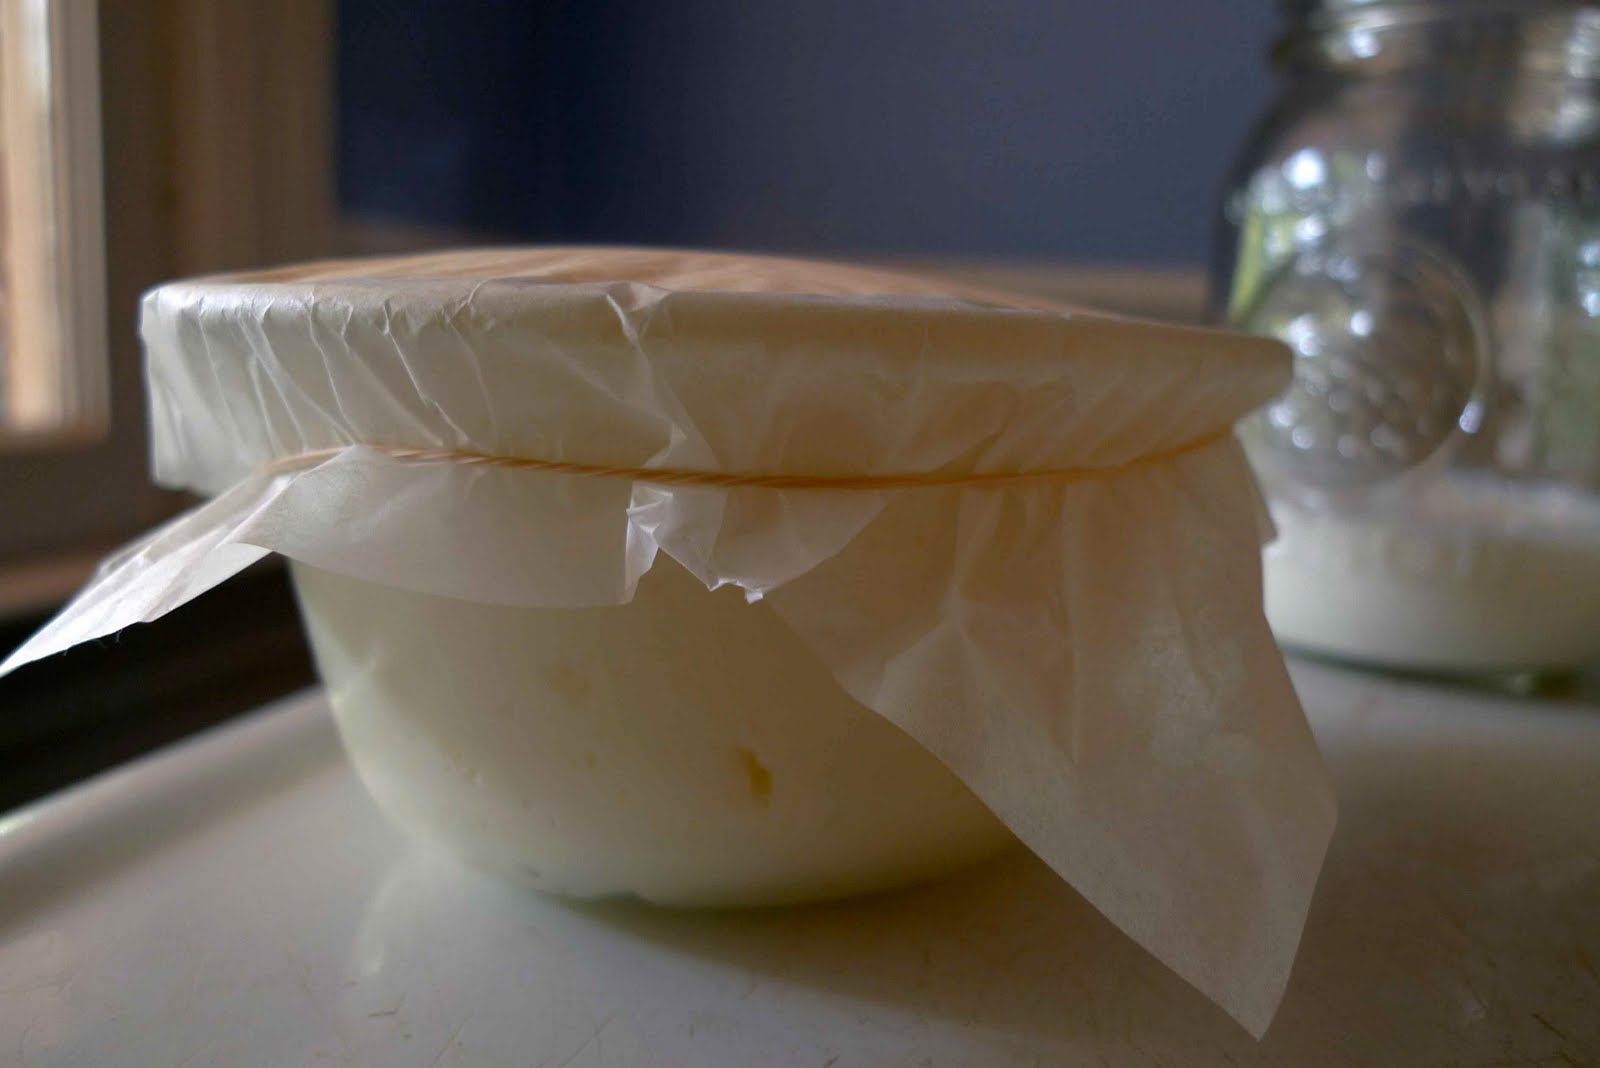 Refrigerate. This butter will last at least a week, and can be used . . . however you'd use butter. This butter turned out fairly light in color, while other batches have been brighter yellow. My mom tells me it has to do with what the cows were eating, along with the fat content of the cream. Of course, you could always color it with juice squeezed from a carrot that's been grated, milk-simmered, and squeezed in cheesecloth, as T. and I just read about in Little House in the Big Woods, but that seems like a lot of trouble to me.
Monday, July 12, 2010
Oatmeal Two Ways
 Steel-cut oats for the kid, with blueberries, agave nectar, sliced almonds, and milk. For me, sambal oelek (fresh chile paste), scallions, cilantro, a splash of soy sauce, and garlic, fried in olive oil until crisp, then drained on a paper towel—one of the best breakfasts ever, I think: spicy and hearty but also fresh-tasting enough to have in midsummer. McCann's makes quick-cooking steel-cut oats now, and I can't discover how they're made and whether they're as good for you as the long-cooking ones, but they taste exactly the same and are done in about 10 minutes. I suspect they're pre-steamed. Does anybody know?
Friday, July 09, 2010
Kid Lunches
 Four sandwiches, yawn, and some potstickers T. asked for and helped make (we cooked some for supper the night before, and froze a bunch uncooked for lunches). Today's box includes homemade yogurt—first time since we moved to town that I've made any, but I'm back on it . . . two quarts at a time. It's good with a little agave nectar and pecans.
Thursday, July 08, 2010
Friday Supper: The Good and the Expensive
The good: Roasted beet salad from Sunday Suppers at Lucques. I used baby red and Chiogga beets and parsley from the market, oil-cured olives, a not-great ricotta salata (feta would've been better), and canned chickpeas. Looking at the recipe now, and not while I was actually making the salad, I realize that I changed it a bit, so that's how I'll type it out below. The instructions in the recipe were kind of fussy; I just tossed everything together with the cumin vinaigrette, then dropped chickpeas over the salad, which was quite pretty enough:
 Roasted Beet Salad with Fried Chickpeas, Nyons Olives, and Ricotta Salata
Adapted and simplified from Sunday Suppers at Lucques, by Suzanne Goin with Teri Gelber
3 bunches beets, mixed colors, tops cut off, scrubbed
1/3 cup extra-virgin olive oil (this is less than the 3/4 cup called for; I prefer a more vinegary, less oily vinaigrette)
1 1/2 teaspoons cumin seeds
1/4 cup red wine vinegar (I used sherry vinegar, and more than the 2-plus tablespoons called for)
Juice of 1 small lemon
1 cup crisp roasted chickpeas (see Note)
1/4 cup thinly sliced shallots
1/2 cup Nyons olives or other strong-tasting oil-cured black olives
1/2 cup flat-leaf parsley leaves
4 ounces ricotta salata cheese, sliced 1/4 inch thick
Kosher salt and freshly ground black pepper
Preheat the oven to 400°F. Rub the beets all over with some of the oil, season with salt and pepper, and put in a roasting pan with a little water. Cover with foil and roast until tender, about 40 minutes. Let cool completely, then peel and quarter the beets. Set aside.
Toast the cumin seeds in a heavy skillet over medium heat until fragrant and a shade darker. Coarsely grind them with a mortar and pestle. Put them in a large bowl with the vinegar, lemon juice, and salt and pepper to taste and whisk. Whisk in the remaining oil in a thin stream. Add the beets, shallots, olives, parsley, and cheese and toss gently to coat with the dressing. Taste and season with more salt and pepper if necessary. Scatter the chickpeas over the top and serve.
Note: Goin wants you to fry the chickpeas, but I roasted them for more crispness, using a great technique I learned from Kalyn's Kitchen: Preheat the oven to 350°F. Line a rimmed baking sheet with aluminum foil. Drain a can of chickpeas in a colander and rinse well under cold running water. Drain well, then dump the chickpeas onto a clean kitchen towel. Gather up the corners of the towel to enclose the chickpeas in a little "bag" and swing it around a bit (outside, perhaps, or maybe in the shower stall) to drain and dry the chickpeas really well. Toss them in a bowl with 1 tablespoon olive oil and a couple tablespoons of soy sauce, and here I also added some of the toasted ground cumin. Spread in a single layer on the foil-lined pan and roast until well browned and crisp-crunchy, about 45 minutes.
And now the expensive: Expensive in this case meaning "not good."
 After having read here and there about the wonder that is the hundred-day-old pastured Poulet Rouge chicken, I went ahead and ordered one from Nature's Harmony Farm in Elberton, via Athens Locally Grown, a kind of brilliant Internet farmers' market in which members place orders on Monday and Tuesday, and pay for and pick up their stuff on Thursday evening at a central location.
Anyway, this chicken. I wanted to roast it simply, to fully appreciate its specialness, and the best way to roast chicken, I've found, is to just spatchcock it, pat it dry and season with salt and pepper and dried thyme, set it in a roasting pan on top of some sliced citrus, and roast at high heat until just about 160°F at the thigh. Then let it rest on a cutting board for a few minutes, carve, and eat. Simple.
Except this chicken was inedible. It was so tough and chewy and stringy we couldn't even get our teeth through pieces of it. People describe the texture as "firm," but that is unhelpful. No, it was like rubber bands, really, lots of rubber bands in your mouth. And it didn't really have any special chickeny flavor that I, a "normal" taster, or D., who I suspect is a better than normal taster, could discern. At all. D. wondered if it was digestible. I wondered if I could throw the whole thing in a pot and at least get some good broth for my sixteen smackers. D. wondered if this was how people in the past ate.
What should I have done differently? I suppose I could've braised. But I didn't want chicken bog, dammit, I wanted roasted chicken. If anyone can give me some seriously promising advice on this matter I might be willing to give it one more shot.
Sunday, July 04, 2010
Tortillas Supermercados
 I went a little slap happy this past weekend. The family and I went to Buford Highway for Indonesian food at the charming Tempo Doeloe (5090 Buford Hwy NW, Doraville), and then we stopped in at Supermercado Chicago (5263) to see if they had fresh masa for sale (I didn't find any). I came out with two kinds of preservative-free corn tortillas, and later picked up a few more varieties for a long-overdue taste test.
Homemade is always better, of course, but I'm supposed to be serving tacos to a crowd (I hope it's one anyway) in a couple weeks and I am kind of losing sleep about how to get everything done, and do it without cooking or warming anything on site. Purchasing the tortillas will just make my life a bit easier.
Here's the lineup, left to right: Olé (with preservatives; made in Norcross, GA, by La Banderita), El Milagro (no preservatives; Doraville, GA), La Banderita (no preservatives; made in Norcross).
 Again left to right: La Banderita mini taco size (with preservatives; Norcross), Guerrero (with preservatives; Irving, TX).
 I warmed all of them one by one in a hot cast-iron skillet just until they started to brown. (Later I tried out various steaming methods and confirmed what I already knew: I don't care for steam-warmed tortillas.) For this comparison I ignored factors like price (they were comparable, as I remember) and availability.
The two that did not have preservatives, El Milagro (the brand I observed more Latinas picking up than any of the others, in two different supermercados) and La Banderita, were coarse-textured, heavy, thick, and had a pretty unpleasant metallic aftertaste. They didn't seem "fresher" to me. With the exception of the Guerrero, the texture of the ones with preservatives was finer and more tender, and perhaps those would not stand up as well to damp fillings—or to time.
The best tasting of all of them, and the one with the nicest texture, was Guerrero: it had lots of masa flavor, it puffed beautifully on the griddle, and was light without being flimsy. Oddly, it was the most rubbery straight out of the package, and I didn't have high hopes for it, but the griddle fixed everything.
La Banderita's mini taco–sized tortilla was probably my second favorite. It also puffed and browned nicely; its flavor was a bit bland compared to the Guerrero and the two no-preservatives brands but not as . . . challenging as the latter.
Conclusion: For personal use, if I'm not making them myself I'll try to make an effort to get Guerrero tortillas (the store on Prince in Athens has them). For the event in a couple weeks I'm going to use the mini tortillas—the size is right for a two- or three-bite sample-type serving, eaten standing up and maybe with a glass in one hand, and the texture and flavor are not bad.
And yes, I had my hamburger off the grill yesterday in a tortilla, with pico de gallo. And I toasted our nation of immigrants.
Saturday, July 03, 2010
Green Apples
 A teacher at T.'s school was selling green apples from her yard a few weeks ago, trying to get them all off the trees before the deer ate them, so I bought four or five pounds and made green apple pectin stock—basically concentrated cooked apple juice that's high in pectin so it can be used as a base for all kinds of jellies. You can keep it in the fridge for a couple weeks or freeze it or can it and it'll last for months. This stuff is what I use to make wine and tea jellies in the winter.
You chop up the apples—cores, seeds, peel, and all, add water to just cover them, and simmer until they fall apart into mush:
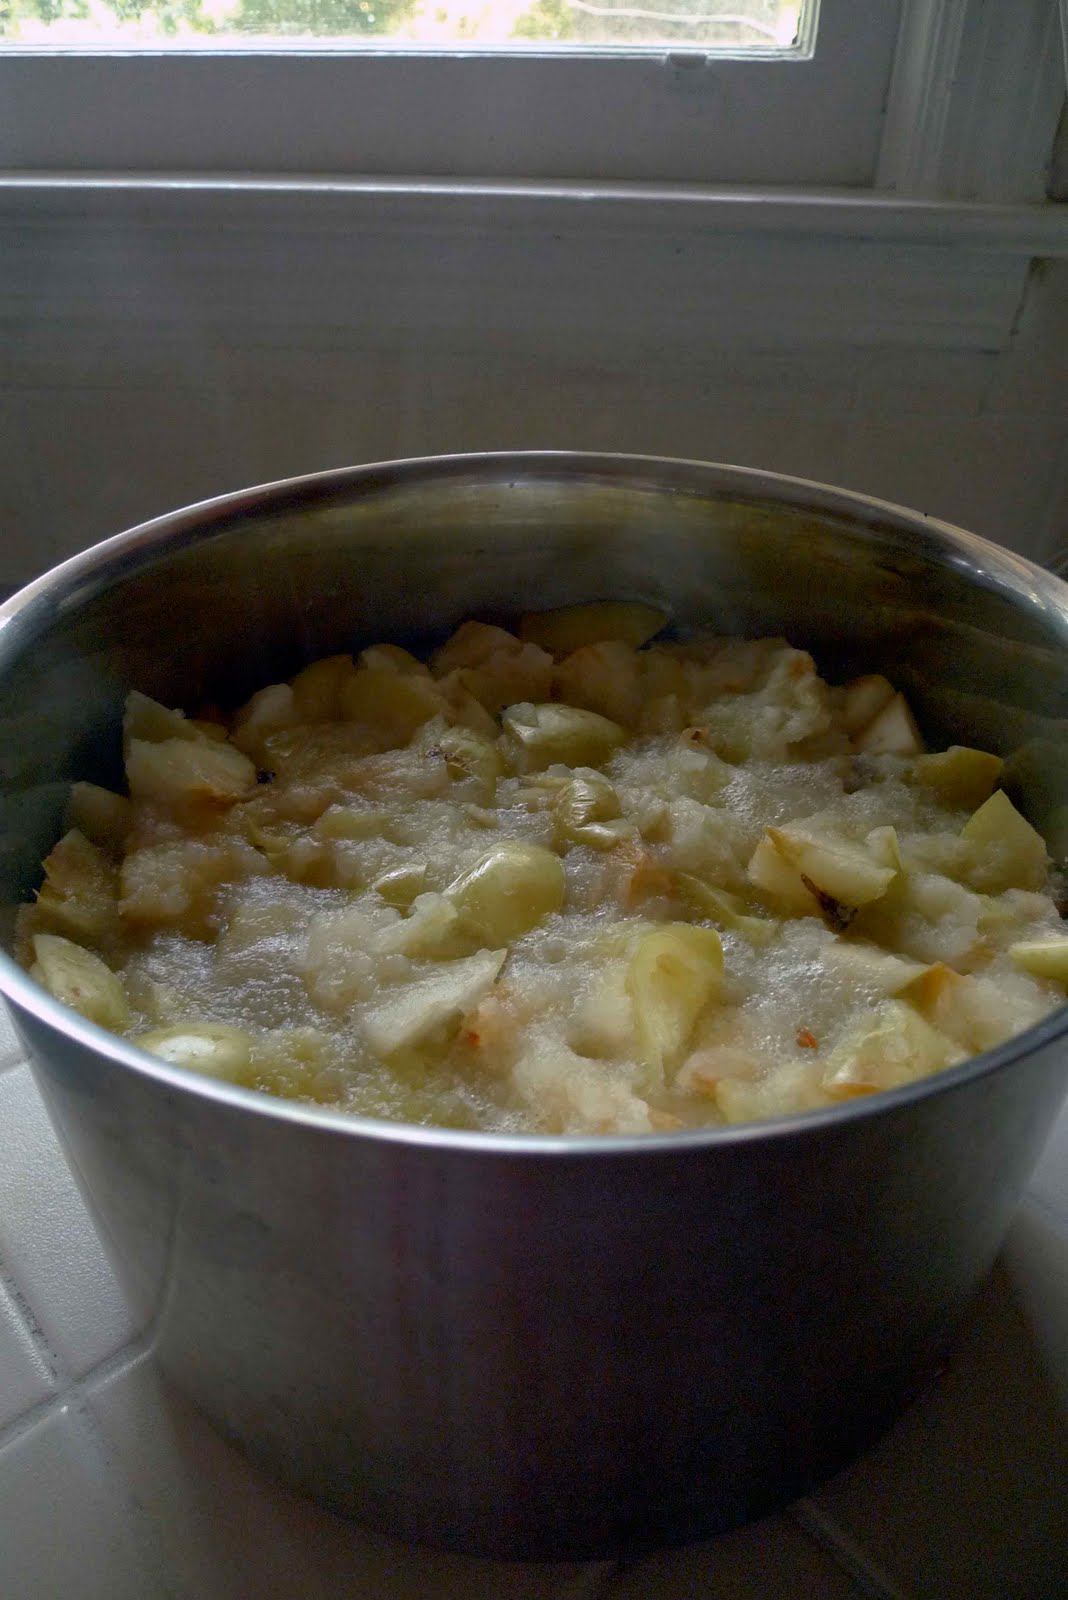 Then you dump everything into a very fine sieve—I use a bouillon strainer (here's an example, since the picture of mine got lost when my computer died last week)—or a huge jelly bag and let it drain and drain and drain:
 Then return that golden juice to the pan and boil it to reduce it by about half. That's it. Green apple pectin stock.
Friday, July 02, 2010
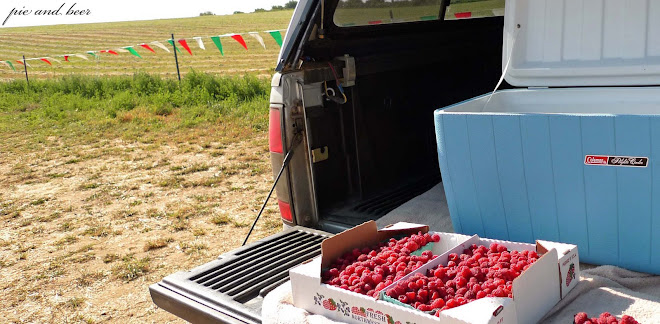
To Pit a Cherry, or Two Hundred
 Last summer when T. and I went out to my parents' place in Washington State for the cherries (and to, you know, visit) I had some slick little Oxo cherry pitters shipped there a week in advance. Hey, I was excited. We don't get many cherries—much less sour cherries—down here in the GA.
I shouldn't have bothered, though, because we determined, through the highly scientific experiment known as a "race," that the paperclip does a much, much faster job. Also a better one, because it makes only one hole in the cherry rather than two, so the cherry stays nice and intact and plump—this is what you want if you're making brandied cherries or sour-cherry preserves, or freezing a quart bag of sweet cherries for a winter clafouti.
First get yourself a large paperclip and unfold it once, like the one in the picture above.
Pull off the cherry stem:
 Hold the cherry firmly in one hand and jam the small fold of the paperclip into the cherry where the stem was, angling it a bit so it slides right along one side of the pit:
You'll be able to feel when the bend in the clip has reached the end of the pit. Now lever the pit and sort of pull it out the hole you just made. You might need to apply a little pressure with the fingers holding the cherry. (It's easier than it sounds.)
 Cherry, one hole, no pit:
This was about four pounds of Bing cherries, and it took maybe ten minutes. So raid the supply closet at the office and pit some cherries this weekend!

More Kid Lunches
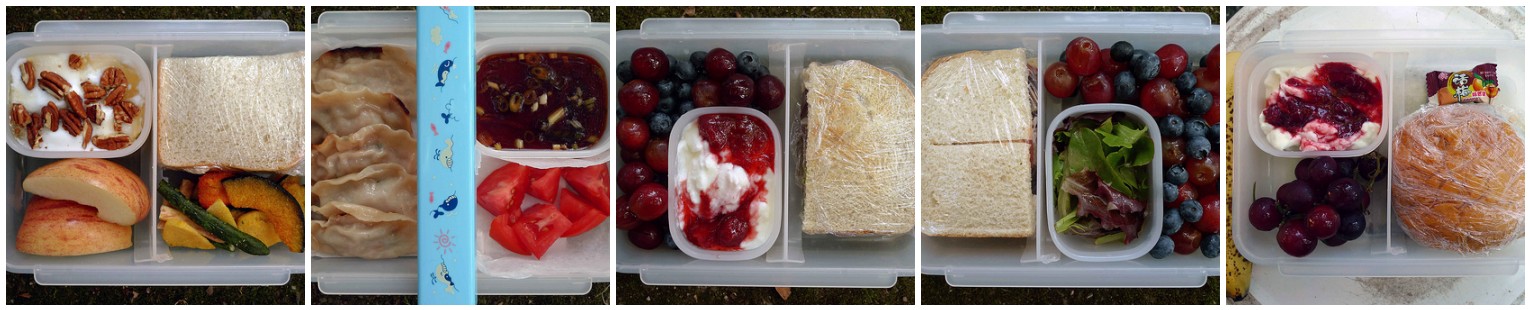
 This week's unintentional theme: Where would we be without yogurt? Mixed with parsley, garlic, salt, and pepper as a dip, and with various fresh fruit and preserves as a dessert. I did not make those "yogurt"-covered pretzels, but heck, maybe I should try that too! You can see the individual pictures here, but basically, working left to right, we've got a beet-green quesadilla, a turkey sandwich and grilled corn, rice and black-eyed peas with salsa, generic sandwich of some sort, and two kinds of leftover rice with leftover Chinese broccoli.
Thursday, July 01, 2010
Book Event at Gosford Wine
Hello! Just a quick note to let you know that Gosford Wine here in Athens is going to be hosting a little wine and preserve tasting and book signing for the canning book, with Rinne Allen (the photographer) and me. Here are the details:
Thursday, July 15
6:30 p.m.
Gosford Wine
1059 Baxter Street (between the library and Rocksprings)
STC is expediting shipment of some (slightly) advance copies of the book, so you can get yours probably even before Rinne and I have gotten ours. Please come out and have some wine and taste samples of dishes from the book, including "Asia tacos" (pork with do chua, cilantro sauce, and pear), Lithuanian-style chilled pickled-beet soup made with homemade yogurt, and a selection of fruit preserves with homemade breads and fresh cheese. I think how the wine part works is that you give the man $10, he gives you a glass, and they pour you five or six wines throughout the evening. It should be a fun time.
I'd love to meet you, kind readers, in person, and give you tacos.
Subscribe to:
Posts (Atom)


